We migrated our blog to Wordpress to make it easier for everyone to comment and like our blog posts.
Please make sure you bookmark our new URL: http://emilyandcj.wordpress.com/
See you there!

Saturday, August 17, 2013
Tuesday, August 13, 2013
Blinded
One of our favorite discoveries when moving into our new home was temporary blinds. Not only did they cover up the windows so snoops couldn't peer into our house, they also cost $5 each. For someone who cannot decide quickly on something so permanent, they were the ideal solution.
However, over the past few months, we were reminded why they are called temporary blinds. They're not meant to be hung up for extended periods of time which we learned pretty quickly when they kept falling down over and over...and over again. We decided to use our handy dandy Frog Tape to keep them attached to the windows which made for a very stylish window. I mean, who doesn't want some temporary paper blinds hung up by some bright green tape? I know, you're jealous already.

Back to the newest development, we did some research on different blind companies, looked in a few catalogs, and visited our second home (The Home Depot, of course) to find the best deal**. We weren't surprised to find that our second home had the best price and exactly what we needed.
So, we finally purchased some beautiful white faux-wood blinds to hang in our house. We wanted to see how they looked first before buying enough for the whole house so we started with the office and guest room. They were so easy to hang up! They take about 20-30 minutes each and look so good! Once we knew we liked them, we bought enough for the family room.


Helpful hint: When you buy your blinds from Home Depot, they take the size of your window and subtract a 1/2" from the width before cutting. They make them a 1/2" thinner because the blinds need that much space on each side for the mounting brackets. Because of that, when you're measuring, I wouldn't round down. The last thing you want is for the blinds to be too thin and have them crash down when you first hang them in the brackets (that happened to us). You also don't want them to be too wide because then they won't fit in your window. So trust the experts and let them remove 1/2" from the width. :)
**As an aside, something else we discovered while being homeowners is the price difference that you'll find between different stores. I HIGHLY recommend doing research on items before you buy them because I bet you'll find it cheaper somewhere else. I'm an anti-BB&B (Bed, Bath & Beyond) shopper because they are WAY overpriced. You'll find items there that are the same price as Pottery Barn but 1/4 the level of quality. For example, we bought a curtain rod there and, when screwing it into the wall, the screw literally broke in half. CJ is pretty strong but I wouldn't say he's the incredible hulk. When we went to our favorite store, The Home Depot, we found a curtain rod for 1/3 of the price and it is way higher quality than the BB&B rod.
However, over the past few months, we were reminded why they are called temporary blinds. They're not meant to be hung up for extended periods of time which we learned pretty quickly when they kept falling down over and over...and over again. We decided to use our handy dandy Frog Tape to keep them attached to the windows which made for a very stylish window. I mean, who doesn't want some temporary paper blinds hung up by some bright green tape? I know, you're jealous already.

Back to the newest development, we did some research on different blind companies, looked in a few catalogs, and visited our second home (The Home Depot, of course) to find the best deal**. We weren't surprised to find that our second home had the best price and exactly what we needed.
So, we finally purchased some beautiful white faux-wood blinds to hang in our house. We wanted to see how they looked first before buying enough for the whole house so we started with the office and guest room. They were so easy to hang up! They take about 20-30 minutes each and look so good! Once we knew we liked them, we bought enough for the family room.


**As an aside, something else we discovered while being homeowners is the price difference that you'll find between different stores. I HIGHLY recommend doing research on items before you buy them because I bet you'll find it cheaper somewhere else. I'm an anti-BB&B (Bed, Bath & Beyond) shopper because they are WAY overpriced. You'll find items there that are the same price as Pottery Barn but 1/4 the level of quality. For example, we bought a curtain rod there and, when screwing it into the wall, the screw literally broke in half. CJ is pretty strong but I wouldn't say he's the incredible hulk. When we went to our favorite store, The Home Depot, we found a curtain rod for 1/3 of the price and it is way higher quality than the BB&B rod.
Sunday, August 11, 2013
House Layout
When Suzanne came to visit our house for the first time, she mentioned that pictures do not do it justice. Actually, several people have told us that! We completely agree. I think part of the problem is that we can't capture a whole room in one shot (hint hint I'd like a wide angle lens for my camera) and the other problem is you don't really get a good feel of the layout of the house through pictures.
To help imagine the layout, I made this quick sketch of how the house is set up:

The whole house is almost 1400 square feet so there's plenty of space for entertaining. One of the main reasons why we bought the house was because of the layout, it really flows well together.
Tomorrow, our landscaping guy is coming over to rip out the little tree in the front yard, remove some bushes, start smoothing out the front yard, install irrigation, and then lay some sod! He said that it will take about 3-4 days to complete. We listened to the advice that our family and friends gave and decided to install irrigation. It will make our lives sooo much easier and it's better to do it now while we have a blank slate. We can't wait to finally have something added to the front yard! It will make a huge difference.
To help imagine the layout, I made this quick sketch of how the house is set up:

CJ and I spent quite some time measuring out each room and this is the best we could do to get the correct proportions. It's pretty close to the real deal.
The whole house is almost 1400 square feet so there's plenty of space for entertaining. One of the main reasons why we bought the house was because of the layout, it really flows well together.
Tomorrow, our landscaping guy is coming over to rip out the little tree in the front yard, remove some bushes, start smoothing out the front yard, install irrigation, and then lay some sod! He said that it will take about 3-4 days to complete. We listened to the advice that our family and friends gave and decided to install irrigation. It will make our lives sooo much easier and it's better to do it now while we have a blank slate. We can't wait to finally have something added to the front yard! It will make a huge difference.
Thursday, August 8, 2013
S'Mores Cups
CJ and I decided recently that when we make
extremely delicious dishes or desserts, we should share them with you!
A couple of months ago, I saw a friend pin this
recipe and I've been meaning to try it out myself. For those of you who don't
already know this, I'm obsessed with s'mores. They remind me of when I was
growing up and we used to go camping in Long Beach, Washington. Late at night,
my parents would go to sleep and it would just be me, my sister, and her
husband. Those were my favorite parts of the camping trips because I got to
spend time with them and hear fun stories from them growing up (way back in the
day... just kidding Katie! ;-) ). It especially meant a
lot to me after we moved to California and didn't see each other as often.
I've tried many version of s'mores - some delicious
and some disappointing. I love s'mores cupcakes from Kara's Cupcakes, but I've
had some pretty bad s'mores cupcakes before. I've made s'mores over the grill
(yes, that's how determined I am) which worked pretty well but still wasn't the
same as a campfire. This recipe however, is the closest I've been able to get
to a s'more without having to set up a fire in my backyard. They are also
extremely easy to make!!
Here's the recipe and a few pictures from my first
(quite successful) attempt.
 |
| So delicious! |
Ingredients:
7
|
whole graham crackers (1 cup/250 mL finely
crushed)
|
1/4
|
cup (50 mL) powdered sugar
|
6
|
tbsp (90 mL) butter, melted
|
4
|
bars (1.55 oz or 43 g each) milk chocolate candy,
divided
|
12
|
large marshmallows
|
Directions:
- Preheat oven to 350F (180C). Place graham crackers into a large resealable plastic bag. Finely crush into crumbs using roller. Combine graham cracker crumbs, powdered sugar and butter in Small Batter Bowl. Using small scoop, place scant scoop of crumb mixture in each cup of mini-muffin pan. Press crumb to form shallow cups with mini-tart shaper. Bake 4-5 minutes or until edges are bubbling. Meanwhile, break two of the candy bars into rectangles. Remove pan from over; place one rectangle into each cup.
- Cut marshmallows in half crosswise using professional shears dipped in cold water. Place one marshmallow half, cut-side down, into each cup. Return to over 1-2 minutes or until marshmallows are just slightly softened. Remove from oven to cooling rack; cool 15 minutes. Carefully remove cups from pan. Cool completely.
- Break remaining candy bars and melt in double boiler. Dip the top of each marshmallow in melted chocolate. Turn top-side up and let stand 40 minutes-1 hour or until set.
Yield: 24 cups
 |
| Can't wait to make these again! |
They turned out so well that I didn't really want to share them with
anyone beyond CJ and myself. But, because I know my boss has a sweet tooth, I
brought in 4 for her. She said they were the most delicious dessert she's ever
tasted. Success! I plan on making another batch so I can share some next time
:)
Monday, August 5, 2013
Landscaping Plans
We are getting ready to start working on our front yard! Both the front and back need a ton of work but we're going to take it one step at a time. We really need to work on the curb appeal of our house because the outside is nowhere near an indication of how adorable the inside of our house is.
We had a landscape designer come over a couple of months ago to draw up plans for the front and back of our house and we love what she came up with. Here's what the plans look like:

We told her that we wanted a traditional theme to the plants because we want the yard to feel cozy and inviting. She really did a great job incorporating what we asked for! When we're ready to start planting the flowers, we just give her a heads up and they will deliver it all, place it where it needs to go, and then we plant it ourselves! We are so excited and hope that we have a few volunteers to help us get it done quickly. Free lunch provided for anyone who wants to help :)
But before we can get started on the plants, we need to add the lawn. We're currently getting estimates from several people to level out the yard (it's all over the place after removing the bricks from the front), mayyyybe do irrigation (although we might opt to water the lawn ourselves to save some moola), and then install the grass. Because it's going to be curved, we think it might be easier to have someone else do that part for us.
Once we tackle the front yard, we'll move to the backyard which is in some serious need of love and care. It's a Kansas wasteland as CJ mentioned which is good, because that means it's a blank slate and not riddled with weeds... but bad, because that means it's not very inviting. Another thing that we need to do in the backyard before we start working on the landscaping is the fence. It is at the end of its life and needs to be completely replaced, which is an expensive project. Hence, we are taking our time and saving up for that.
Stay tuned for updates on the yard! We hope to have the front yard finished by the time we have our housewarming party.
We had a landscape designer come over a couple of months ago to draw up plans for the front and back of our house and we love what she came up with. Here's what the plans look like:

We told her that we wanted a traditional theme to the plants because we want the yard to feel cozy and inviting. She really did a great job incorporating what we asked for! When we're ready to start planting the flowers, we just give her a heads up and they will deliver it all, place it where it needs to go, and then we plant it ourselves! We are so excited and hope that we have a few volunteers to help us get it done quickly. Free lunch provided for anyone who wants to help :)
But before we can get started on the plants, we need to add the lawn. We're currently getting estimates from several people to level out the yard (it's all over the place after removing the bricks from the front), mayyyybe do irrigation (although we might opt to water the lawn ourselves to save some moola), and then install the grass. Because it's going to be curved, we think it might be easier to have someone else do that part for us.
 |
| Our bare front yard - the bricks in the very front are now gone! |
Stay tuned for updates on the yard! We hope to have the front yard finished by the time we have our housewarming party.
Monday, July 29, 2013
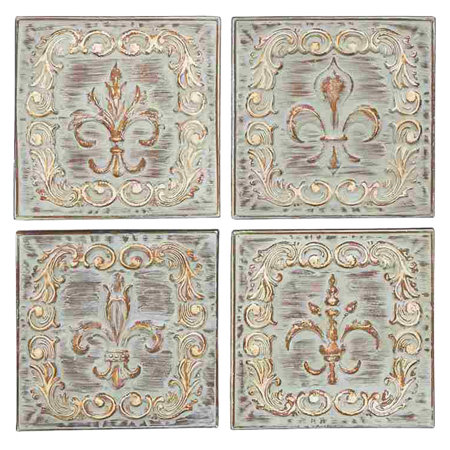
Mirror Mirror on the Wall
Who's the fairest of them all? Not quite sure, but I can tell you that the wall above the credenza is quite adorable! We've been looking through Houzz and Joss & Main for nice piece of artwork to hang over the credenza for the past few months and finally found the perfect addition!
Here's a "before" picture:

A few ideas we liked initially:


Here's a "before" picture:

A few ideas we liked initially:
 |
| We thought a mirror with a fun border would be a nice addition. Although, they were all a bit out of our price range. |
 |
| Then we thought maybe some artwork? |
But even though they were adorable, they still didn't feel quite right. Then, one fateful trip to Target changed the search entirely. I was wandering through the home decorating aisles just in case I stumbled upon something cute when I saw the most adorable set of 3 mirrors. It was exactly what we were looking for but I didn't want to buy it until I showed it to CJ. Unfortunately, when I got home to show it to CJ on the Target website, I noticed that it was only available online. That means that I only saw it in the store because someone returned it! By the time we went back to Target to buy it, it was gone. We were bummed but decided to just order it online and anxiously wait for it to arrive.

Something else we loved about these mirrors? They are a 1/3 of the price of everything else we were looking at. SOLD!
It was delivered a few days later, we hung it up, and we are in love! The mirrors look perfect above the credenza especially with our new white ceramic vase and flowers from HomeGoods!


Sunday, July 28, 2013
Guest Who?
This past weekend, we had two important [temporary] additions to the house. The first, an old trusty dusty trash bin, and the second, someone who I could stuff into it, the Peanut! For those of you less familiar with the Peanut, she's my sister and also goes by Suzanne.

What did we accomplish, you might ask? These past few weeks, I was working on cleaning up the loose bricks to redo the front row. But, after taking a closer look, we decided that we wanted to remove the front row of bricks altogether and use them to add another level to the mini-brick wall closer to the house. So, with the help of a hammer and chisel, I officially removed the small front brick walls and trimmed up the plants in front of our house that were getting a little cozy with the neighbor's rooftop. My poor hand has seen better days; we noticed at dinner on Saturday that a my left index finger was nice and purple.
 |
| So tired |
Along with the removal of the brick, the old wood shelving in the garage is now residing in the bottom of above-mentioned dumpster as well. The garage is looking a little messier until we get a new shelf and organize everything we have but, in the end, it will be much better than the previous setup. I still need to pull down the two mysterious doors in the rafters and the long piece of plywood that are just hanging about collecting dust spiders and who knows what else.

Suzanne gave several bushes a nice #2 cut before we ripped them out entirely in the backyard. Basically, all that is left after all of our hard work this past weekend is a Kansas wasteland with three rocks, two bushes, and a whole bunch of wannabe hedge plants. Oh and the tiny fruit tree.
Thanks again to Suzanne who came up and pitched in! Hopefully she had fun up with us as the first guest at our house. We know we did and can't wait until her next visit!
 |
| Sunday morning crepe breakfast! |
Sunday, July 14, 2013
Pillows and Blinds and Drapes. Oh My!
We still haven't decided what we want to call our back room - TV room, family room, entertainment room... there are so many options! Well, whatever the room name is, we've been working on decorating it and it's coming together nicely. So far, the changes since the last time I talked about the room are - the addition of pillows, the entertainment center, hanging up a photo frame, and the blinds but it's about to get another big update soon!
Here's what the room looked like when we first toured the house:

During the remodeling, termite damage was found by the fireplace so they had to open up the walls, replace the wood, and close everything up. So, here's what the room looked like before the move-in process.

Then we started moving stuff in (notice the room was painted and the fan was replaced)...

Once we unpacked, the room looked wayyyy better.


See those green lines at the top of the windows? Those are the temporary blinds being held up by Frog Tape (awesome tape by the way. I would highly recommend it). The temporary blinds kept falling down so we threw some frog tape up there to keep them in place. Not the classiest of looks but it took us a while to figure out what type of blinds we wanted to buy for the house. Thankfully, we finally installed faux wood blinds two weeks ago so the room looks wayy better.
Over the course of the last few months, we searched high and low for the perfect pillows. At first, I wanted pillows with several different colors to bring some life into the room. Then, as I thought about it, I realized that having several colors on the pillows wasn't necessary, they just needed to have SOME color on them. When I went away for my friend's bachelorette party weekend, CJ ran a few errands and ended up stumbling upon the most adorable pillows at Pottery Barn. He bought them, brought them home, and I am madly in love with them.
Here's how the room looks today:
 |
| In person, the couch color is more like the photo without the pillows. The flash changed the color of the couches in this photo, but you get the idea. |
 |

 |
| Close-up of the pillows |
 |
| Close-up of the pillows |
It already looks so much better! As far as what we just ordered that's going to make a HUGE difference in how the room looks - drapes from Pottery Barn!! We are sooo excited to hang them. They will be hung on either side of the TV (so 2 drapes next to each window). It will make the wall more dramatic and will bring more color into the room as well.
Here's a mini preview of how it will all look together.

We're also planning on painting the inside of the fireplace black since it looks a bit discolored from previous fires. We'll make sure it's fire-resistant just in case we use it for its' intended purpose but, in the meantime, I'd like to put in a pretty candle holder. One of the houses I toured had one in their fireplace and it looked so cute! See below.

We need to do a bit of research on what type of paint to use as well as deep clean the inside of the fireplace before we start that project. The guy at Home Depot was skeptical that we could paint the inside of it if it's already been used so we're determined to prove him wrong!
We are so happy with how everything is coming together in this room!!
Thursday, July 11, 2013
July Shutdown
I think it's safe to say that last week was the most productive week at our house in the history of us owning it. Why do you ask? Well, first of all, I had the week off from work. My wonderful company shuts down the first week of July almost every year for the 4th of July holiday. It's always wonderful to have a break especially when I had so many things on our "To Do" list! Second of all, we made a list of what we wanted to finish and we were able to check them all off AND MORE!
Here's a list of what we accomplished:
Here's a list of what we accomplished:
- FINALLY hung blinds in the guest room, office, and TV room (7 sets of blinds, to be exact)
- Replaced all the door knobs in the house - they were mismatched (one side of the door was silver, other side gold) so as stylish as they were, they had to go. Not to mention, they were old and were painted over so they definitely needed to be replaced.
- Retextured the walls in the formal living room and hallway (we hired someone to do this, not our area of expertise) - 2 day job
- Painted the formal living room and hallway
- Deep cleaned the entire house
- Replaced the shower curtain in the guest bath - the one we originally bought did not match the sink as well as I wanted and it drove me nuts
- Hung up the wedding gift painting
- Hung up a window picture frame in the TV room
- Found curtains for the TV room - just need to buy them :)
- Removed a bunch of extra bricks in the front yard
I'm a list maker and I'm quite proud of the fact that the entire list was completed.
The formal living room looks so different painted that I do a double take every time I walk through it. For the past 6 months, it's been a storage room/hallway/assembly space so it's weird to see it actually come together as a room. We absolutely love it and can't wait to add in the final touches (which sounds like there isn't much left, but there is!).
Another highlight of last week was that we had a very furry house guest! Our dog Abby, who lives with my parents, stayed over for the week while my parents were on a fun vacation on Maine. It was so fun to have her here even though we still find tufts of hair throughout the house to this day. It's actually weird to walk into the kitchen, living room, or garage and not see her there. We definitely miss her already.
At the end of the week, we headed over to my parents' beautiful cabin in the Sierra mountains and relaxed for the weekend. It was definitely a well-deserved mini-vacation and we can't wait to go back. We went to Lake Alpine one day to lay out on the rocks and eat lunch, went to an Independence Day Celebration at Ironstone Vineyards (complete with wine tasting, delicious food, live music, and fireworks), made mouth-watering home cooked meals, and just relaxed. We don't get up to the mountains often enough so we need to make more of an effort to visit there.
 |
| This was my view of the living room on Day 1 of the retexturing |
 |
| The cutest corgi you will ever meet |
 |
| At Ironstone |
 |
| At Ironstone enjoying the concert |
 |
| The beautiful fireworks! |
 |
| We got awesome photos! |
Wednesday, July 3, 2013
Painting & Texturing...In Progress
Wonder what's happening in our house this week? Our formal living room and hallway are getting retextured and painted!! This house will finally feel more settled once this is finally done. Every time I walk through the front room, I'm reminded that we need to get it painted so I am SO happy that it's finally happening. We've have blue swatches painted on those walls for months. Not to mention, our beautiful painting from our family friend has been patiently waiting to be hung up in the formal living room for almost 6 months now and it is time to put it on display!
Why did it take so long, you might wonder? If you can remember back to May, I posted that I thought the room would get painted the following week (meaning 2 months ago)... clearly that didn't happen. It's been impossible to get our painter to commit to a date. Remodels, family emergencies, out of town... you name it, he's said it. He is such a sweet guy which is why we waited for him (plus, we know he does a good job) but seriously, we were getting antsy. We would have painted the room and hallway ourselves but we really wanted it to get retextured. After the kitchen remodel, part of the opening was a different texture than the rest and, in the hallway, there was a lantern-like light that we removed and covered up. It was covered up nicely but that area was completely smooth while the rest of the wall had the funky 50's style texture that the rest of the house has. Therefore, it was necessary that we evened out the walls and made it consistent.
Here's what the front room looked like on Monday (the day before they started work):

Okay, I lied that was the room on May 13 but it's pretty close to how it looked on Monday. We now have a cute floor lamp in the room, but you get the idea. :-)
Do you like our beautiful Cost Plus bookshelf? We were eyeing that thing for years! We just didn't know we actually needed it until we bought our house and realized that a bookshelf would be perfect on that wall. It conveniently covers up the thermostat but has an open back so we can easily get to it to adjust the temperature. Plus, we love the design on the side of the bookshelf.
Here's a recap of our checklist. I'm checking off the painting since it will be done in the next few days.
Loveseat
Side chairs
Side table
Buy a bookshelf for the wall to the left of the loveseat
Paint the walls a grayish blue
- Hang our beautiful wedding gift (painting by family friend)
- Buy the remaining furniture - end table, ottoman, and
floor lamp - Buy an area rug
- Pick out fabric for the curtains
- Sew the curtains (task for my superwoman mother)
- Hang the curtains
- Get a plant to bring in some life
- Hang pictures
- Make/buy a piece of artwork to hang over the credenza
So there's still a lot left to do but I will feel a lot better once the room is actually painted. There was another big change in the house this past weekend that we did ourselves (woohoo!) which I will hopefully post about soon. Just need to upload the photos.
Subscribe to:
Posts (Atom)