Pages

Sunday, July 14, 2013

Pillows and Blinds and Drapes. Oh My!

We still haven't decided what we want to call our back room - TV room, family room, entertainment room... there are so many options! Well, whatever the room name is, we've been working on decorating  it and it's coming together nicely. So far, the changes since the last time I talked about the room are - the addition of pillows, the entertainment center, hanging up a photo frame, and the blinds but it's about to get another big update soon!

Here's what the room looked like when we first toured the house:


During the remodeling, termite damage was found by the fireplace so they had to open up the walls, replace the wood, and close everything up. So, here's what the room looked like before the move-in process.


Then we started moving stuff in (notice the room was painted and the fan was replaced)...


Once we unpacked, the room looked wayyyy better.


See those green lines at the top of the windows? Those are the temporary blinds being held up by Frog Tape (awesome tape by the way. I would highly recommend it). The temporary blinds kept falling down so we threw some frog tape up there to keep them in place. Not the classiest of looks but it took us a while to figure out what type of blinds we wanted to buy for the house. Thankfully, we finally installed faux wood blinds two weeks ago so the room looks wayy better. 

Over the course of the last few months, we searched high and low for the perfect pillows. At first, I wanted pillows with several different colors to bring some life into the room. Then, as I thought about it, I realized that having several colors on the pillows wasn't necessary, they just needed to have SOME color on them. When I went away for my friend's bachelorette party weekend, CJ ran a few errands and ended up stumbling upon the most adorable pillows at Pottery Barn. He bought them, brought them home, and I am madly in love with them. 

Here's how the room looks today:

In person, the couch color is more like the photo without the pillows. The flash changed the color of the couches in this photo, but you get the idea.


Close-up of the pillows

Close-up of the pillows

It already looks so much better! As far as what we just ordered that's going to make a HUGE difference  in how the room looks - drapes from Pottery Barn!! We are sooo excited to hang them. They will be hung on either side of the TV (so 2 drapes next to each window). It will make the wall more dramatic and will bring more color into the room as well. 

Here's a mini preview of how it will all look together.


We're also planning on painting the inside of the fireplace black since it looks a bit discolored from previous fires. We'll make sure it's fire-resistant just in case we use it for its' intended purpose but, in the meantime, I'd like to put in a pretty candle holder. One of the houses I toured had one in their fireplace and it looked so cute! See below.


We need to do a bit of research on what type of paint to use as well as deep clean the inside of the fireplace before we start that project. The guy at Home Depot was skeptical that we could paint the inside of it if it's already been used so we're determined to prove him wrong! 

We are so happy with how everything is coming together in this room!!

Thursday, July 11, 2013

July Shutdown

I think it's safe to say that last week was the most productive week at our house in the history of us owning it. Why do you ask? Well, first of all, I had the week off from work. My wonderful company shuts down the first week of July almost every year for the 4th of July holiday. It's always wonderful to have a break especially when I had so many things on our "To Do" list! Second of all, we made a list of what we wanted to finish and we were able to check them all off AND MORE!

Here's a list of what we accomplished:
  1. FINALLY hung blinds in the guest room, office, and TV room (7 sets of blinds, to be exact)
  2. Replaced all the door knobs in the house - they were mismatched (one side of the door was silver, other side gold) so as stylish as they were, they had to go. Not to mention, they were old and were painted over so they definitely needed to be replaced.
  3. Retextured the walls in the formal living room and hallway (we hired someone to do this, not our area of expertise) - 2 day job
  4. Painted the formal living room and hallway
  5. Deep cleaned the entire house
  6. Replaced the shower curtain in the guest bath - the one we originally bought did not match the sink as well as I wanted and it drove me nuts
  7. Hung up the wedding gift painting
  8. Hung up a window picture frame in the TV room
  9. Found curtains for the TV room - just need to buy them :)
  10. Removed a bunch of extra bricks in the front yard
I'm a list maker and I'm quite proud of the fact that the entire list was completed.

The formal living room looks so different painted that I do a double take every time I walk through it. For the past 6 months, it's been a storage room/hallway/assembly space so it's weird to see it actually come together as a room. We absolutely love it and can't wait to add in the final touches (which sounds like there isn't much left, but there is!).

This was my view of the living room on Day 1 of the retexturing
Another highlight of last week was that we had a very furry house guest! Our dog Abby, who lives with my parents, stayed over for the week while my parents were on a fun vacation on Maine. It was so fun to have her here even though we still find tufts of hair throughout the house to this day. It's actually weird to walk into the kitchen, living room, or garage and not see her there. We definitely miss her already.

The cutest corgi you will ever meet
At the end of the week, we headed over to my parents' beautiful cabin in the Sierra mountains and relaxed for the weekend. It was definitely a well-deserved mini-vacation and we can't wait to go back. We went to Lake Alpine one day to lay out on the rocks and eat lunch, went to an Independence Day Celebration at Ironstone Vineyards (complete with wine tasting, delicious food, live music, and fireworks), made mouth-watering home cooked meals, and just relaxed. We don't get up to the mountains often enough so we need to make more of an effort to visit there.

At Ironstone

At Ironstone enjoying the concert

The beautiful fireworks!

We got awesome photos!

Wednesday, July 3, 2013

Painting & Texturing...In Progress

Wonder what's happening in our house this week? Our formal living room and hallway are getting retextured and painted!! This house will finally feel more settled once this is finally done. Every time I walk through the front room, I'm reminded that we need to get it painted so I am SO happy that it's finally happening. We've have blue swatches painted on those walls for months. Not to mention, our beautiful painting from our family friend has been patiently waiting to be hung up in the formal living room for almost 6 months now and it is time to put it on display!

Why did it take so long, you might wonder? If you can remember back to May, I posted that I thought the room would get painted the following week (meaning 2 months ago)... clearly that didn't happen. It's been impossible to get our painter to commit to a date. Remodels, family emergencies, out of town... you name it, he's said it. He is such a sweet guy which is why we waited for him (plus, we know he does a good job) but seriously, we were getting antsy. We would have painted the room and hallway ourselves but we really wanted it to get retextured. After the kitchen remodel, part of the opening was a different texture than the rest and, in the hallway, there was a lantern-like light that we removed and covered up. It was covered up nicely but that area was completely smooth while the rest of the wall had the funky 50's style texture that the rest of the house has. Therefore, it was necessary that we evened out the walls and made it consistent.

Here's what the front room looked like on Monday (the day before they started work):


Okay, I lied that was the room on May 13 but it's pretty close to how it looked on Monday. We now have a cute floor lamp in the room, but you get the idea. :-)

Do you like our beautiful Cost Plus bookshelf? We were eyeing that thing for years! We just didn't know we actually needed it until we bought our house and realized that a bookshelf would be perfect on that wall. It conveniently covers up the thermostat but has an open back so we can easily get to it to adjust the temperature. Plus, we love the design on the side of the bookshelf.

Here's a recap of our checklist. I'm checking off the painting since it will be done in the next few days.


  • Loveseat
  • Side chairs
  • Side table
  • Buy a bookshelf for the wall to the left of the loveseat
  • Paint the walls a grayish blue
  • Hang our beautiful wedding gift (painting by family friend)
  • Buy the remaining furniture - end table, ottoman, and floor lamp
  • Buy an area rug
  • Pick out fabric for the curtains
  • Sew the curtains (task for my superwoman mother)
  • Hang the curtains
  • Get a plant to bring in some life
  • Hang pictures
  • Make/buy a piece of artwork to hang over the credenza

So there's still a lot left to do but I will feel a lot better once the room is actually painted. There was another big change in the house this past weekend that we did ourselves (woohoo!) which I will hopefully post about soon. Just need to upload the photos. 

Tuesday, July 2, 2013

Cord Frenzy

When our entertainment center arrived, we quickly filled it with all of our electronics - cable box, video game consoles, internet router, etc. - but immediately noticed that the cord situation was out of control. Of course, it was good to get all of the materials off the floor (because that was driving me bonkers) but I knew that the cords needed to be covered up somehow. I don't know about you, but I'm not a fan of seeing cords all over the place. I'm anti-clutter and cords everywhere is not my idea of clutter-free.

The "Before" with the out of control cords
We decided to do a mini-arts & crafts project to cover it up. We popped over to our neighborhood Jo-Ann Fabrics and bought one foam poster board and a yard of black fabric (to blend in with the back of the shelf.

I wish I took photos of the process but it's so easy! Here's what I did:

  1. Measured the shelves
  2. Cut the foam board to fit within the shelves (take off about a 1/4-1/2 inch from the height depending on how many cords to have, the cords will slide under the board)
  3. Cut a small triangle on the top of the board (this will make it easier to pull the board out if you ever need to remove it)
  4. Cut the fabric to be about 1 inch larger than the size of the board 
  5. Glue the fabric to the back of the board (I used regular super glue)
  6. Let it dry and BAM! You're done
It literally took me about 15 minutes but made a world of difference. 

Here's the final result! I didn't cover up all of the cords but I was able to cover up the majority of them.

The "After"!


And zoomed out a bit:


Now we just need to figure out what to put on top of it! I've been doing research and there are so many cute ideas! Just need to find items that are a good price :)


Friday, June 21, 2013

Flashback Friday

One of the reasons why I love home improvement shows and blogs so much are because I LOVE seeing the before and after. It is soooo gratifying to see the difference!

Because of that, I knew that we needed to take "before" pictures of our house especially because we planned on making a ton of changes to the house. But somehow in the whirlwind that was our house buying/renovating/moving process... we never took any pictures. Well, I guess that's not completely true, we did take pictures of the kitchen before it was ripped out but we didn't take any pictures of the bedrooms, office, or living room until after the floor was sanded and we were painting the room.

I went on a hunt tonight to see if I could find the photos that were posted online when our house was listed and thankfully, I was able to find them online. Here's what the house looked like when we first visited it:

Backyard

Another angle of the backyard (with the brick planter box that CJ had to tear out)

Guest bathroom (only change here is we have a shower curtain)

Guest bedroom (obviously big changes here)

The kitchen - can you believe the difference!??! 

Another view of the kitchen 
Formal living room

Another angle of the formal living room (that's the front door)

Master bedroom (no changes here)

Master bedroom (clearly this looks completely different) 
Office

TV/Entertainment Room

I love looking at these photos because it reminds me how much we've accomplished in the past 6 months as homeowners! I can't wait to see what other changes we make in the next 6 months.

Here's a brief recap of what we've been able to check off our "to-do" list:
  1. Remodeled the kitchen - This is one item on the list but this was a 2-month project complete with choosing custom cabinets, buying appliances, choosing the hardware, buying the granite, picking out the sink, deciding on the layout, picking the wall color. Everything is brand new!
  2. Put baseboards in the entire house
  3. Sanded and refinished the floors
  4. Expanded the master closet to a walk-in
  5. Painted the kitchen, TV/entertainment room, office, guest room, and master bedroom
  6. Hung photos in the master and guest bedroom
  7. Ripped out all the plants in the front yard
  8. Ripped out the brick planter and hedges in the backyard 
  9. Furnished the house
  10. Started to decorate the rooms
  11. And so many more small things :)
Homeownership is not easy but it's gratifying and SO worth it. :)

Thursday, June 20, 2013

Guest Room Love

Since Day 1 (meaning since we put an offer on the house), I had a vision for how I wanted the guest room to look (thanks to Houzz.com*). We knew that we wanted a light and bright room to make it feel a bit larger and we wanted it to coordinate with my college IKEA bedroom furniture that we put in the guest room. After searching a bit, I found this inspiration and fell in love with it for the guest room:


Isn't that gorgeous!?!? I just love the gray and yellow combination. It's so simple yet inviting.

The white duvet cover was relatively easy to find. We first looked at Target and Bed, Bath & Beyond but the bedding at those two stores was unfortunately out of the price range we were willing to spend for the guest room. Luckily though, we made a trip to IKEA one day and found the perfect plain white duvet cover for approx. $30. We were so excited about the find and even more excited about the price tag!

So, as I said before, decorating the house really is a process. Below is a picture of the guest room on the day we moved in. I didn't have the energy time to iron the sheets so I just laid them on top of the bed to give the illusion that it was made. I know, so sneaky. I would have fooled you if I didn't tell you my secret.

Day 1 - February 10

As time went on, the room started to evolve more. We put the nightstand to the left of the bed, I ironed the sheets (GASP!) and finally put them on the pillows and duvet cover, and we bought a nice gray blanket to mirror the inspiration room. So that brought us to this:


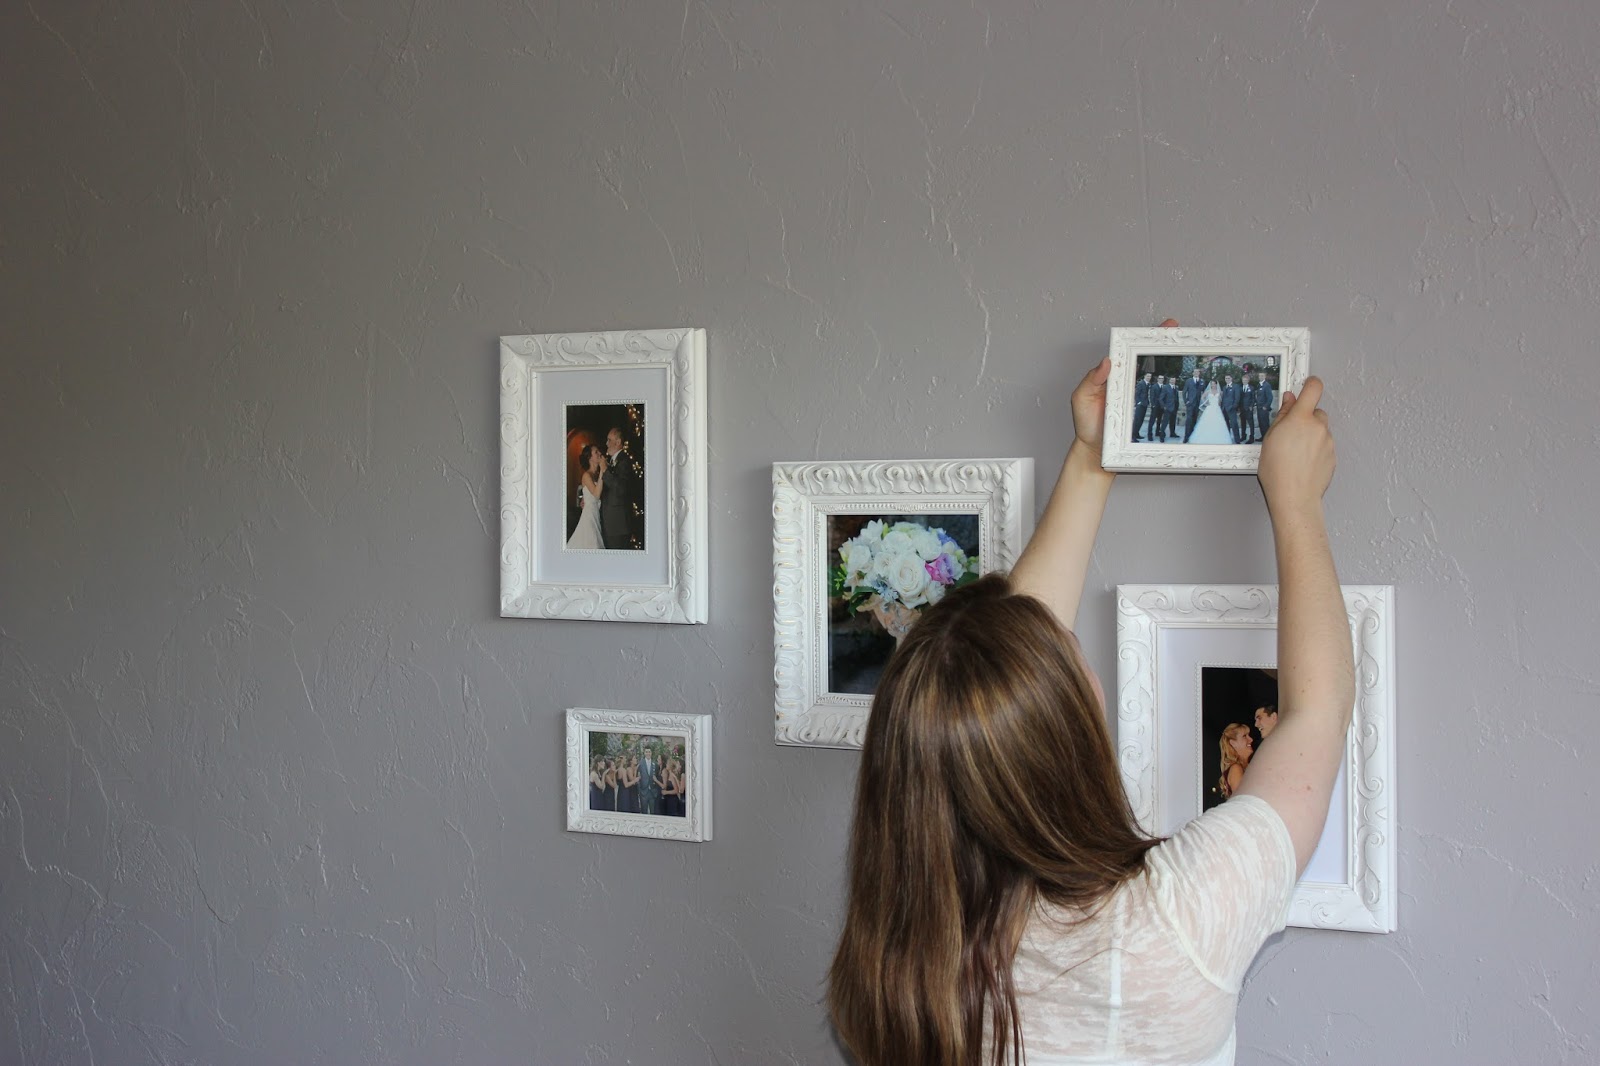
Not winning any awards but still progress. That brought us to our latest project that I reference in my last post. We bought 5 frames at Aaron Bros (as I fondly call it) and wanted to do a nice little arrangement on the left wall. We also got an adorable lamp and pillows from Cost Plus and then BAM! We were ready to start making the room feel more inviting.

Step 1: Pick the photos & put them in the frames
This part is pretty self-explanatory. We chose a photo of the mother-son dance, father-daughter dance, my bouquet, me and the groomsmen, and CJ and the bridesmaids.

Step 2: Choose an arrangement
I saw a super helpful post on my favorite blog YoungHouseLove.com that talked about first doing the arrangement on butcher paper, sketching it out, and using that paper to help with hanging the photos. We decided that, since this was more complicated than the master bedroom, we needed the extra help.

So we bought a big roll of white paper (it was impossible to find butcher paper, for some reason), and rolled it out on the floor to lay out the arrangement.


Step 3: Trace the pictures with a pencil, mark where the nails should go, cut the roll of paper, and tape it up to the wall.


I swear, the squares are up there. If I were to draw on top of that so you could envision the arrangement, it would look like this:


Step 4: Mark where the nails should go in the wall by following the guides on the paper and nailing a small hole in each area.


Step 5: Remove the paper, find the small holes that we made, and nail it in!


Step 6: Hang the pictures!


Step 7: Admire your work :)

After we were done hanging the photos, we put the adorable pillows in the room and the lamp and Voila! We had an adorable guest room.


I now creepily walk past the guest room several times a day to stare at our work.

Here's a close up of the lamp:


It has the gray and yellow to go with the color scheme and has a cute owl base!! Oh, I'm so in love.

Right now, the lamp is hanging out next to my bridal bouquet but we're not sure if that's the permanent home for the bouquet. I'm afraid someone will knock it off and then we will lose our wedding keepsake.

We still need some blinds, curtains, and a rug for the room. I also think we might get a bookshelf for the right side of the room; that wall is looking pretty lonely right now. But we're content with how it looks right now! No need to rush through the rest of the enhancements. :)

*Houzz is an amazing source for decorating ideas so if you ever feel stuck on what to do with a room, I highly recommend going there. They have a great app and their website is super helpful too. You can create ideabooks for whatever floats your boat (I've created them by room, it's easier for me to find stuff that way).

Friday, June 14, 2013

One Step Closer

Two weekends ago, my parents came over for dinner at our house and after my mom did her usual "inspection" of the house to see what's changed, she turned to me and said, "You really need to start hanging some pictures." Man, is that the truth! I knew that was the reason why we still didn't feel fully moved in. I completely agreed with her so my goal for last weekend was to hang all the frames that we bought a few weeks ago.

First up, the master bedroom! I would have to say that the hardest part of hanging picture frames is figuring out what pictures to put in the frames. We went through a ton of our engagement and wedding pictures and chose three - one of us holding hands in our engagement photos, one of our wedding date from our engagement photos, and one of us holding hands on our wedding day. We wanted to keep it simple and thought that these ones were really sweet and romantic.

Hanging these frames wasn't too difficult but it was a lot more difficult than the method we used in the guest room (to be talked about in a later post). The hardest part is making sure that you're nailing everything in the right place especially since I'm a perfectionist and will notice if something is even a 1/2 inch off.

Here's a before and after:


Anddddd here's a close up of the photos above the bed:


One thing I've learned throughout this house process is that it really is a process. You can't just move in and have everything set up and decorated the next day (unless you have superpowers). It's really not possible and, even if it was, it's better to take your time. It's so much more gratifying to enjoy the process of picking out the decorative items and to see the house come together step by step. I LOVE seeing how one day the guest room is just a bed and then the next day, after just a few pillows, it's a bedroom. (More on this in another post!)

And last but not least, CJ, my mom, and I participated in the Silicon Valley Kidney Walk on June 1 in support of our wonderful friend Sheila. Go Team Fred!