
The white duvet cover was relatively easy to find. We first looked at Target and Bed, Bath & Beyond but the bedding at those two stores was unfortunately out of the price range we were willing to spend for the guest room. Luckily though, we made a trip to IKEA one day and found the perfect plain white duvet cover for approx. $30. We were so excited about the find and even more excited about the price tag!
So, as I said before, decorating the house really is a process. Below is a picture of the guest room on the day we moved in. I didn't have the
 |
| Day 1 - February 10 |
As time went on, the room started to evolve more. We put the nightstand to the left of the bed, I ironed the sheets (GASP!) and finally put them on the pillows and duvet cover, and we bought a nice gray blanket to mirror the inspiration room. So that brought us to this:

Not winning any awards but still progress. That brought us to our latest project that I reference in my last post. We bought 5 frames at Aaron Bros (as I fondly call it) and wanted to do a nice little arrangement on the left wall. We also got an adorable lamp and pillows from Cost Plus and then BAM! We were ready to start making the room feel more inviting.
Step 1: Pick the photos & put them in the frames
This part is pretty self-explanatory. We chose a photo of the mother-son dance, father-daughter dance, my bouquet, me and the groomsmen, and CJ and the bridesmaids.
Step 2: Choose an arrangement
I saw a super helpful post on my favorite blog YoungHouseLove.com that talked about first doing the arrangement on butcher paper, sketching it out, and using that paper to help with hanging the photos. We decided that, since this was more complicated than the master bedroom, we needed the extra help.
So we bought a big roll of white paper (it was impossible to find butcher paper, for some reason), and rolled it out on the floor to lay out the arrangement.

Step 3: Trace the pictures with a pencil, mark where the nails should go, cut the roll of paper, and tape it up to the wall.

I swear, the squares are up there. If I were to draw on top of that so you could envision the arrangement, it would look like this:


Step 5: Remove the paper, find the small holes that we made, and nail it in!

Step 6: Hang the pictures!
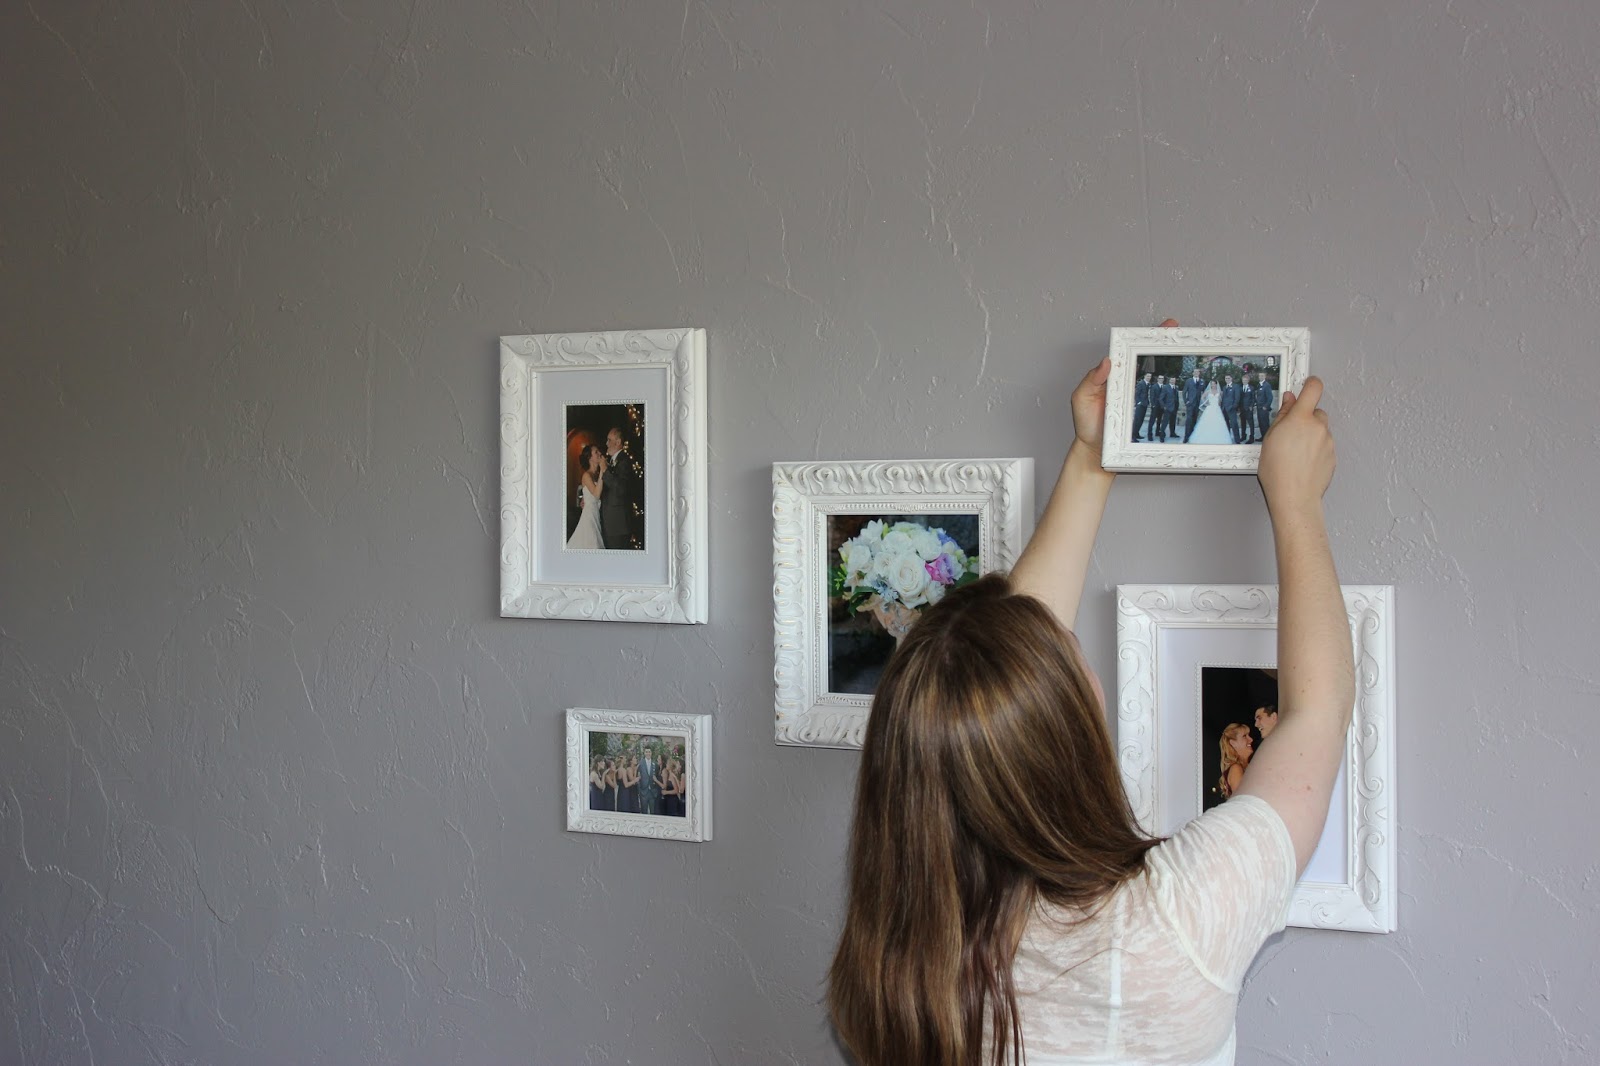
Step 7: Admire your work :)
After we were done hanging the photos, we put the adorable pillows in the room and the lamp and Voila! We had an adorable guest room.

Here's a close up of the lamp:

It has the gray and yellow to go with the color scheme and has a cute owl base!! Oh, I'm so in love.
Right now, the lamp is hanging out next to my bridal bouquet but we're not sure if that's the permanent home for the bouquet. I'm afraid someone will knock it off and then we will lose our wedding keepsake.
We still need some blinds, curtains, and a rug for the room. I also think we might get a bookshelf for the right side of the room; that wall is looking pretty lonely right now. But we're content with how it looks right now! No need to rush through the rest of the enhancements. :)
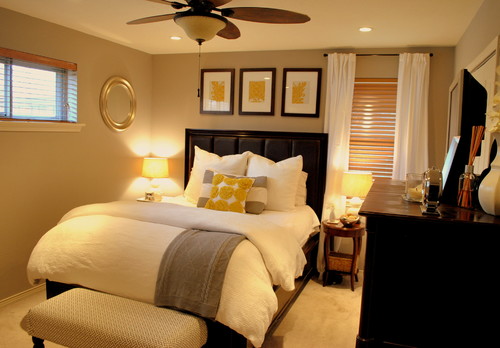
*Houzz is an amazing source for decorating ideas so if you ever feel stuck on what to do with a room, I highly recommend going there. They have a great app and their website is super helpful too. You can create ideabooks for whatever floats your boat (I've created them by room, it's easier for me to find stuff that way).
Looks great! Very impressive the process you go through. I can tell you're having a great time with all this. Looking forward to getting up there again to see all the changes you've made since Feb!
ReplyDelete